
How to: Creating a Custom Facebook Tab
So you want to create a custom Facebook tab for your page, but have no idea where to begin?
As you may or may not know, custom tabs on a Facebook page are actually simple Facebook apps. The structure of Facebook apps, like many things in Facebook, has evolved and changed over time. One of the most significant - and for some, most confusing - changes took effect October 1, 2011, regarding secure hosting of pages for Facebook app iframe content. Since October 1st, all content pulled into a page tab via iframe must be hosted on a secure server - SSL, with an “https://” header rather than “http://”. This is because Facebook now offers users the option to browse facebook securely, and any users who are browsing securely will not be served nonsecure content.
Don’t let the technical jargon scare you - if you know how to create an html page or even just a web graphic, you will have no problem with the details of creating a simple facebook tab page. To do this, first access the developer’s area by visiting https://developers.facebook.com/apps - and login with your existing facebook credentials. Toward the upper right corner of the screen, there is a button “Create New App” - clicking on this will take you to a dialog box where you can specify an App Name and App Namespace.

The first is a human readable name - if the name you type in is already in use, the dialog box will warn you. The second is more of an ID - it’s a good practice to use only lowercase letters, numbers, dashes and underscores in choosing a namespace. The third option doesn’t apply to this walkthrough - more on that in a future blog post. Here, we are creating a simple demo tab - which we’re naming Demo Tab. Once you click Continue, you will be asked to fill in a captcha verification. You are now ready to start configuring your app.
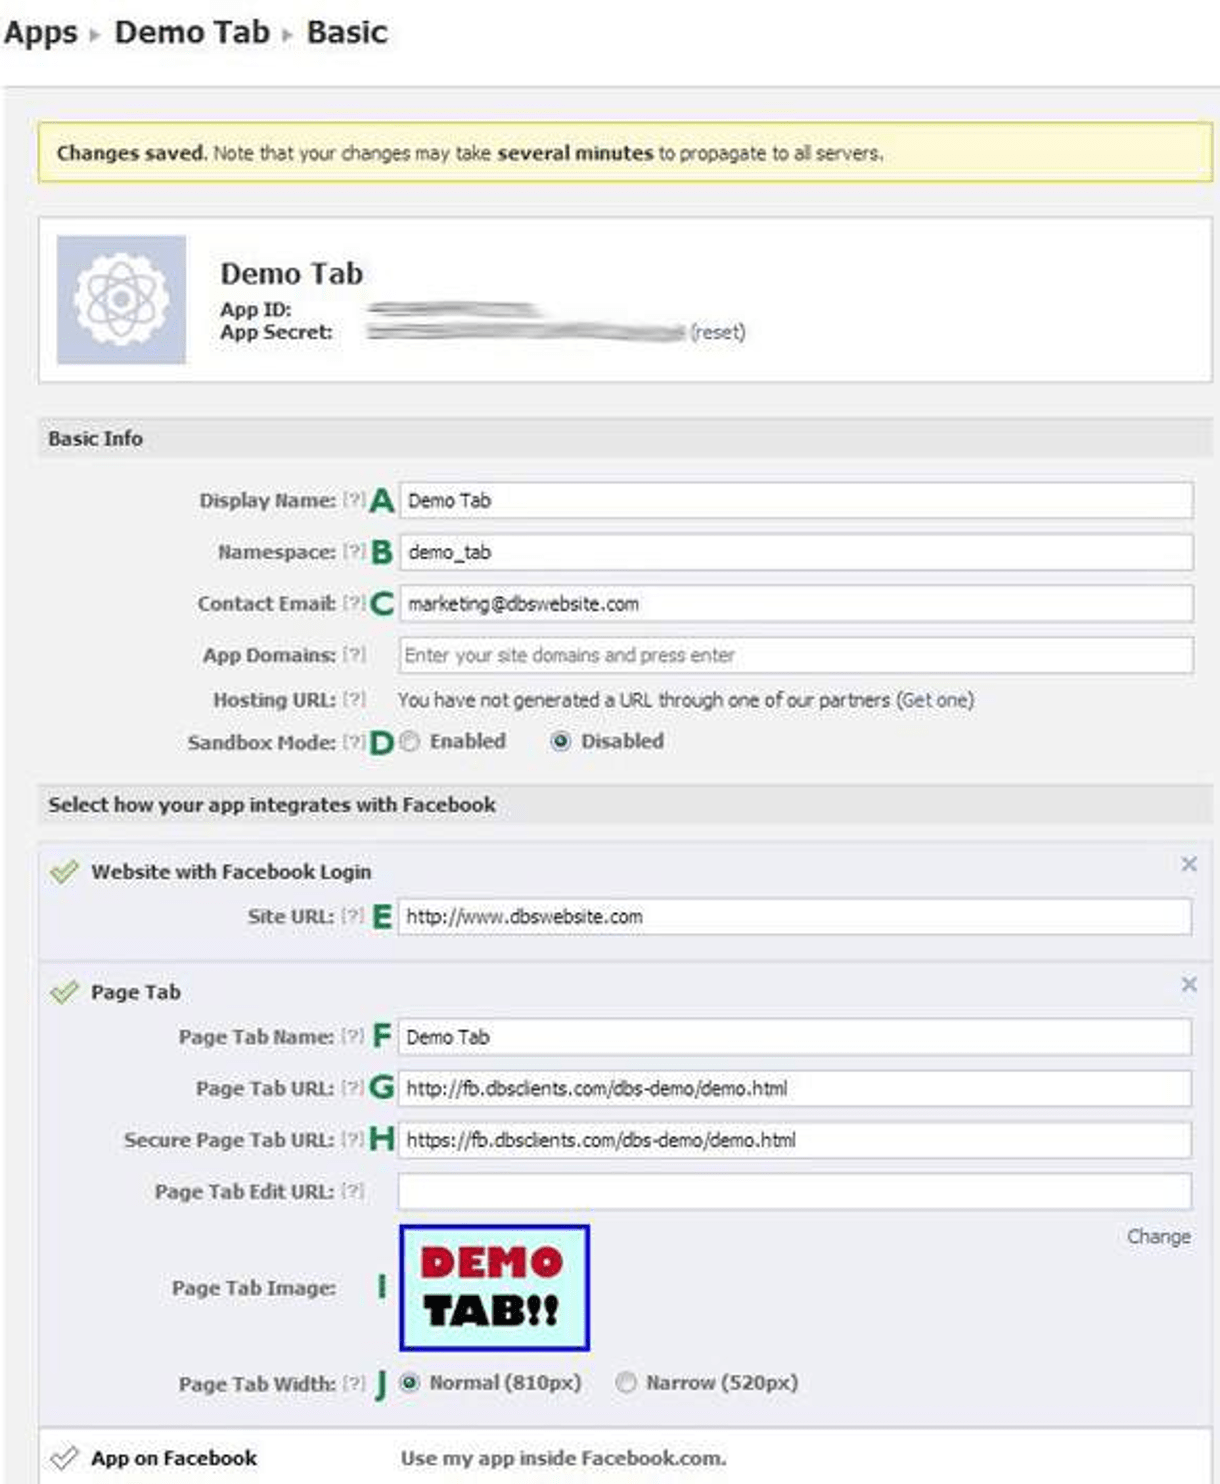
For a simple page tab app, there aren’t that many details to configure. For our purposes we only need to fill in data in three of the subsections that you see below.
KEY
A. Human readable name - you already chose this when creating the app.
B. Namespace - again you already chose one.
C. Your contact email.
D. You must disable Sandbox Mode when you are ready to go live.
E. Specify your main website’s URL.
F. The name you want to show up as the tab name - you will probably put the same thing here as in A.
G. The URL location of the web content you will be pulling into your tab page in an iframe.
H. The secure URL location of the same - this is important - if you don’t have a secure URL to put here, facebook users who have chosen secure browsing will not be able to see your page content.
I. An image for the “tab” part of this page tab - you can upload any graphics file of the dimensions 111 x 74 pixels.
J. Choose either a normal (810 px) or a narrow (520 px) page tab width. By default, the height should be 800 px or less - this height can be changed via scripting, but that’s beyond what we need for a simple page tab
Now, you will need to actually create the content for the tab. This can be html, or a jpeg or png, or even a server-side content page such as php or asp. The important guideline is to make sure that the dimensions are firmly fixed at 810 px (or 520 px) x 800 px. If you are using an image, simply make the image that size. If it is an html page or similar, you can use css styling to force absolute dimensions, using overflow:hidden as an extra safeguard. It is important to do this because if you don’t, you may end up with the dreaded scroll bars - no one wants to see scroll bars in a facebook tab!
Once you have created your content, named the file as you had specified, and uploaded it to your server, you are ready to add the tab to your page. The way this is done is a little tricky, but not hard. You can find the information you need to create the URL by looking at the summary tab of the app (the example below has our App ID blurred out, but yours obviously won’t be when you are looking at your screen).

Once you do this, you will get a dialog box where you can choose which of your facebook pages to add the tab to (if you have more than one).
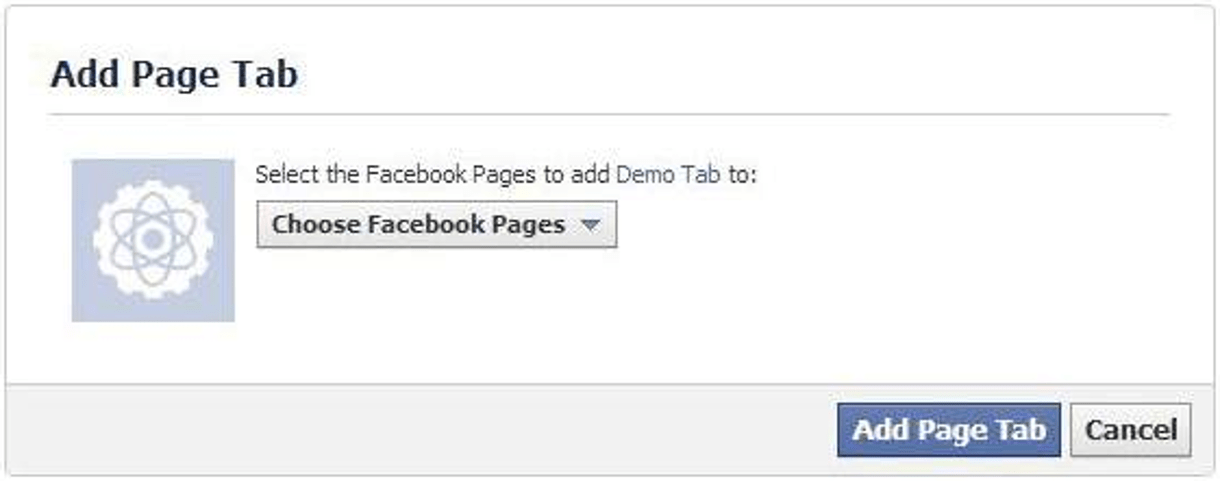
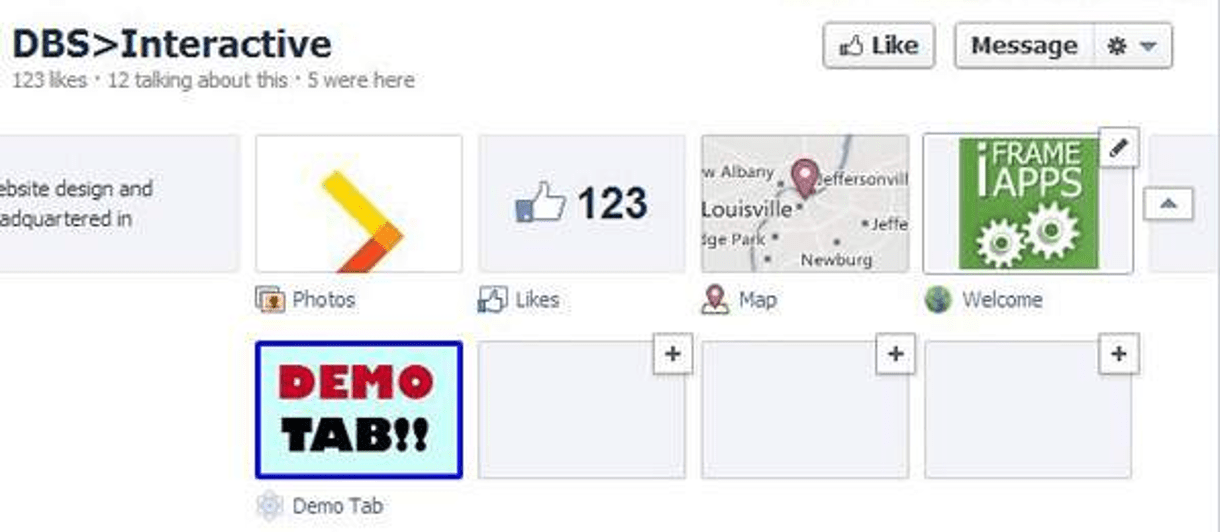
Once you click Add Page Tab, you should be able to go to your page and see this new tab there.

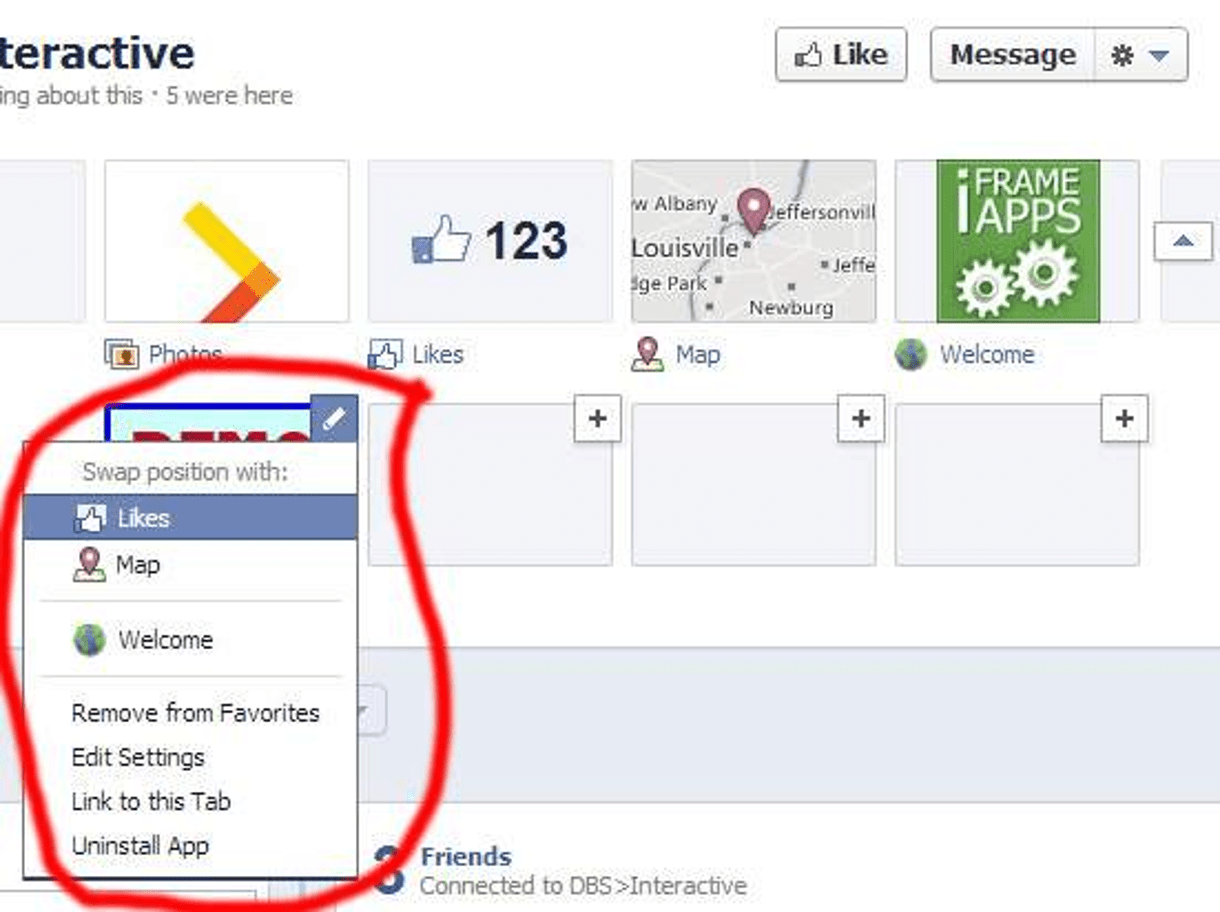
By default, it will put the tab in whatever the last tab “slot” is that you have available. However, you may want to change its position. This can be accomplished by hovering over the tab image until you see the little pencil icon, then click on it once to activate the dropdown menu, where you can choose to swap the tab’s position with another tab, as well as some other relevant options.
